How to Build a Video Conferencing App Like Zoom? [Guide]
Every video conference has its own purpose – an important client meeting, a life-changing interview, or an immediate doctor consultation.
For any such reason, we immediately turn to apps like Zoom.
These apps connect everyone instantly, and easily. Yet, sometimes they miss the mark in 2 major areas:
1. Giving users a personal touch of the business, or brand.
2. Securing user data
If you are already running a business, it is very important to address these gaps, as it might affect your user experience, and above that, their safety.
What if you build your own custom video conferencing platform? This could be one of the best strategic moves you could take for your business. You solve multiple issues in just one shot!
Agree this is a good idea?
This guide will walk you through the step by step process of building a custom video conferencing platform with features that match your workflow, security requirements and budget.
Alright, let’s get started!
Table of Contents
What Makes Zoom Video Conferencing Unique?
If you are planning to get inspiration from Zoom for your video conferencing platform, you might need to clearly understand the app. This section will uncover some of the unique characteristics of Zoom that makes it stand out from others in the industry.
Of course, Zoom wasn’t the first video conferencing app. But it eventually dominates the market for the following reasons:
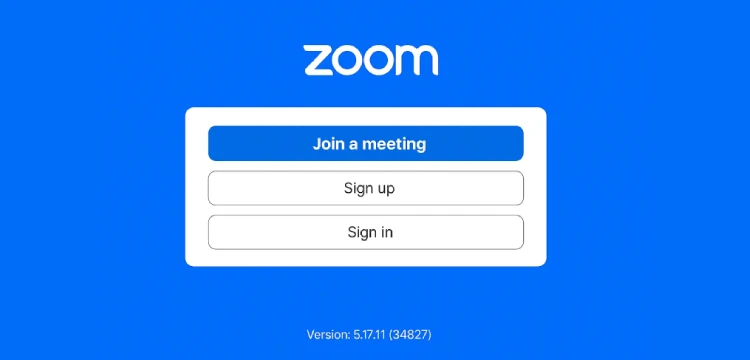
Zoom wasn’t the first video conferencing tool, but it became dominant because:It’s super-simple: Join a meeting – that’s the button you need to click to start a video conversation.
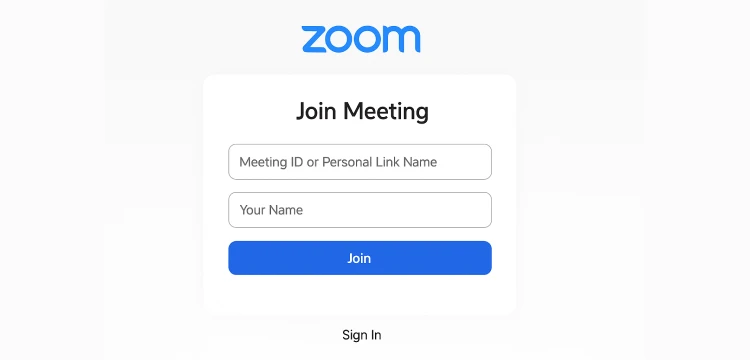
It will take you to the pane with a Meeting ID. If you have one, you just need to input the ID and you’ll be in already.
It’s intuitive
Zoom is full of features. You can find anything and everything you want in a video conferencing platform.
Here are some of the key capabilities of Zoom that users usually love to use.
When I say intuitive, it means it is one of the easiest apps to use without much effort although it is loaded with features. Users will not feel the app is overwhelming as it is uniquely designed to be easy to use.
This is one of the key takeaways of how you need to plan your app.
10 or 1000 participants – Zoom scales really well
Sometimes your webinars or Zoom sessions are going to be a massive hit. You’ll have to host 1000s of participants at the same time. Other times, it could be a discussion only for a small group. Whatever be the size of the conference, Zoom can accommodate users easily and scale according to your needs.
Already excited about building a Zoom-like app? Let’s begin the development process.
📍This Is Where You Get Started: Define Your MVP
My first piece of advice: don’t try to build all of Zoom at once.
Many developers try to replicate the exact Zoom app and sometimes get stuck midway through the process. That might complicate things for you.
Instead, you can begin with a basic MVP with a few core features:
- User registration and authentication
- Create and join meetings
- Basic video and audio calling
- Simple chat functionality
- Screen sharing
Once you test this MVP and clear out all the bugs, you are good to go with the next stage – Adding advanced features. When you are confident that your MVP is doing its job, go ahead and add features such as:
- Recording
- Virtual backgrounds
- Breakout rooms
- Advanced admin controls
Step by step enhance your app with features and capabilities, test it at every phase and deploy when it’s ready for launch.
Which IDE Should You Choose to Build a Video Conferencing App?
Before writing any code, you’ll need:
A code editor: Visual Studio Code is what I’d recommend for beginners
Version control: Set up Git and GitHub. This is very important to keep track of the previous versions of your app, so if you get lost in the mid-way you can go back to the saved versions instead of starting the cycle all over again.
Development frameworks: Decide if you’re building for web, mobile, or both
Steps to Build Video Conferencing App Like Zoom
Here is the shortcut to use MirrorFly Video Conferencing SDK
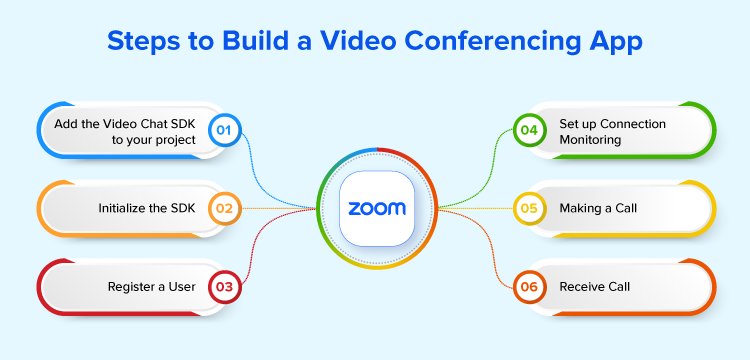
If building a WebRTC platform from scratch seems too complex (and honestly, it can be challenging for beginners), consider using a ready-made video conferencing SDK like MirrorFly. Here’s a step-by-step implementation:
Step 1: Add the SDK to your project
Add these to your app’s build.gradle file:
dependencies {
    implementation 'com.mirrorfly.sdk:mirrorflysdk:7.13.16'
 }
And in your gradle.properties:
android.enableJetifier=trueStep 2: Initialize the SDK
In your Application class:
ChatManager.initializeSDK("LICENSE_KEY", (isSuccess, throwable, data) -> {
            if(isSuccess){
                Log.d("TAG", "initializeSDK success ");
            }else{
                Log.d("TAG", "initializeSDK failed with reason "+data.get("message"));
            }
        });
To your AndroidManifest.xml , add the following code
<?xml version="1.0" encoding="utf-8"?>
<manifest xmlns:android="http://schemas.android.com/apk/res/android"
    package="com.example.uikitapplication">

    <application
        android:name=".MyApplication"  // Add this line.
        android:icon="@mipmap/ic_launcher"
        android:label="@string/app_name"
        android:roundIcon="@mipmap/ic_launcher_round"
        android:theme="@style/AppTheme">
        <activity android:name=".MainActivity">
            <intent-filter>
                <action android:name="android.intent.action.MAIN" />
                ...
                <category android:name="android.intent.category.LAUNCHER" />
            </intent-filter>
        </activity>
    </application>
Step 3: Register a user
After initialization, register the user:
FlyCore.registerUser(USER_IDENTIFIER, (isSuccess, throwable, data ) -> {
        if(isSuccess) {
            Boolean isNewUser = (Boolean) data.get("is_new_user");  // true - if the current user is different from the previous session's logged-in user, false - if the same user is logging in again
            String userJid = (String) data.get("userJid"); //Ex. 12345678@xmpp-preprod-sandbox.mirrorfly.com (USER_IDENTIFIER+@+domain of the chat server)
            JSONObject responseObject = (JSONObject) data.get("data");
            String username = responseObject.getString("username");
        } else {
           // Register user failed print throwable to find the exception details.
        }
   });
Step 4: Set up connection monitoring
ChatManager.setConnectionListener(new ChatConnectionListener() {
    @Override
    public void onConnected() {
        // Write your success logic here to navigate Profile Page or
        // To Start your one-one chat with your friends
    }

    @Override
    public void onDisconnected() {
        // Connection disconnected
    }

    @Override
    public void onConnectionFailed(@NonNull FlyException e) {
        // Connection Not authorized or Unable to establish connection with server
    }

    @Override
    public void onReconnecting() {
        // Automatic reconnection enabled
    }
});
Now, use the below code to initialize the SDK
@Override
public void onCreate() {
super.onCreate();

//set your call activity
CallManager.setCallActivityClass(CALL_UI_ACTIVITY.class);
CallManager.setMissedCallListener((isOneToOneCall, userJid, groupId, callType, userList,CallMetaData[] callMetaDataArray) -> {
  //show missed call notification
});

CallManager.setCallHelper(new CallHelper() {
      @NonNull
      @Override
      public String getNotificationContent(@NonNull String callDirection,CallMetaData[] callMetaDataArray) {
          return CallNotificationHelper.getNotificationMessage();
      }

  });

CallManager.setCallNameHelper(new CallNameHelper() {
      @NonNull
      @Override
      public String getDisplayName(@NonNull String jid,CallMetaData[] callMetaDataArray) {
          return ContactManager.getDisplayName(jid);
      }
  });
}
The Call UI Activity should be specified in your manifest as follows.
<activity
            android:name="YOUR_CALL_ACTIVITY"
            android:configChanges="screenSize|smallestScreenSize|screenLayout|orientation"
            android:excludeFromRecents="true"
            android:launchMode="singleTask"
            android:resizeableActivity="false"
            android:screenOrientation="portrait"
            android:supportsPictureInPicture="true"
            android:showOnLockScreen="true"
            android:turnScreenOn="true"
            android:taskAffinity="call.video"
            tools:targetApi="o_mr1" />
Next, you must invoke the following method in your call activity’s onCreate() to configure the call activity.
CallManager.configureCallActivity(ACTIVITY);To dismiss the ongoing call notification, invoke the following method in the onStart() of your call activity to inform the video and audio calling SDK.
CallManager.configureCallActivity(ACTIVITY);To display the ongoing call notification, invoke the following method in the onStop() of your call activity to notify the call SDK.
CallManager.unbindCallService();Preparing User JID
To generate a JID for a user, use the following method.
FlyUtils.getJid(USER_NAME)Step 5: Making a call
CallManager.makeVoiceCall("TO_JID",CALL_METADATA, (isSuccess, flyException) -> {
            if(isSuccess){
                 //SDK will take care of presenting the Call UI. It will present the activity that is passed using the method `CallManager.setCallActivityClass()`
                Log.d("MakeCall","call success");
            }else{
                if(flyException!=null){
                    String errorMessage = flyException.getMessage();
                    Log.d("MakeCall","Call failed with error: "+errorMessage);
                    //toast error message
                }
            }
        });
Step 6: Receive Call
When you get an audio call from another SDK user, the call SDK will show a notification if your device is running Android 10 (API level 29) or higher. If your device has an older Android version, the call screen you set using the CallManager.setCallActivityClass() method during SDK setup will open with the call details. A sample call UI is also available for easy integration.
Answer the Call
When you receive an audio call from another SDK user, your activity may start depending on the Android version. When the user taps the Accept button in your call UI, you must call the following SDK method to answer the call and notify the caller.
CallManager.answerCall((isSuccess, flyException) -> {
            if(isSuccess){
                Log.d("AnswerCall","call answered success");
            }else{
                if(flyException!=null){
                    String errorMessage = flyException.getMessage();
                    Log.d("AnswerCall","Call answered failed with error: "+errorMessage);
                    //toast error message
                }
            }
        });
Decline the Call
When you receive an audio call from another SDK user, your activity may start depending on the Android version. When the user taps the Decline button in your call UI, you must call the following SDK method to reject the call and notify the caller.
CallManager.declineCall();Disconnect the Ongoing Call
If you make an audio call to another SDK user and want to disconnect it before it connects or end an ongoing call after the conversation, you need to call the following SDK method when the user taps the Disconnect button in your call UI. This will disconnect the call and notify the caller.
CallManager.disconnectCall();
So, that’s it. This is how easily you can build a video conferencing app for your business, instead of writing every code yourself. Now, for more understanding on using a pre-built SDK, let’s compare the timelines of building a video platform from scratch vs using a custom solution
Custom Video Conferencing App: Development Timeline
Let’s set expectations. For a beginner, here’s a realistic timeline:
Weeks 1-2: Learn fundamentals, set up environment, build auth system
Weeks 3-4: Implement basic video calling (one-to-one)
Weeks 5-6: Add chat functionality and screen sharing
Weeks 7-8: Build group calling capability
Weeks 9-10: Polish UI, add error handling, improve performance
Weeks 11-12: Testing and debugging
That’s 3 months for a basic Zoom-like app. Professional apps take teams of developers much longer.
But, with a pre-built video solution like MirrorFly, the learning curve is much lower since most of the complex WebRTC and backend infrastructure is already handled. Meanwhile, the development process is also very short as you’ve got them all built already. All you need to do is just use the solution and build your video conferencing platform in some 48 hrs!
Quick Tips On Building Your Zoom-like App
- Start by cloning a simpler app: Before building Zoom, try creating a one-to-one video chat
- Use console.log liberally: I agree WebRTC is complex. Just log everything during your development journey and it will help you somewhere later.
- Focus on one platform first: Build your web platform at its best before expanding to mobile
- Test on slow connections:See if your app can handle poor network conditions. If not, optimize it.
- Hire experts: If you think you need a hand, don’t hesitate to get help from experts to build your video conferencing platform.
Have MirrorFly By Your Side!
We’ve covered the step-by-step process of building a video conferencing app like Zoom, from choosing the right tools to adding features like video calls, screen sharing, and security.
These ready-made apps may often seem easy, but they often lack flexibility, scalability, and full control over your data. That’s why building a custom video conferencing app is actually a smarter choice.
With MirrorFly’s Video Calling API & SDK, you can create a fully customizable app with high-quality video, secure messaging, and complete data control. Whether you need your own branding, advanced features, or customizable security, MirrorFly has it all!
Why use a standard solution when you can have one built just for you?
Contact MirrorFly’s Sales Team today and start creating your own video conferencing app!
Good luck with your project!
Build Your Own Zoom-like Video Conferencing app in 48 hrs
We’ve built a white-label video, voice, chat, SIP, and screen-sharing solution just for you. See for yourself how our solution works for different use cases
Talk to Us!
Related Articles
How To Embed Video Conferencing In Website
How Can You Ensure Secure Video Conferencing
How to make a dating app like Tinder or Bumble?
How to Integrate Video Conferencing API in a Mobile App (iOS/Android)?
What Types Of Businesses Can Benefit From A Video Conference System?
How To Find The Best Group Video Call App With Screen Sharing And Chat?